Best Practice Guide: How to Strip Floor Finish
Restoring resilient flooring can breathe new life into any space, whether it's a commercial building or a healthcare facility. However, before applying a fresh coat of finish, it is crucial to remove the previous layers of finish completely. This removes all discolored finish, improving the overall appearance of the new finish. With the right procedure and careful considerations, you can effectively strip floor finish without incurring unnecessary costs or causing damage.
In this article, we will help you identify the best floor-stripping product and outline a best practice procedure that will help you optimize manpower and minimize your total cost.
Choosing the Best Floor Stripper For Your Situation
The first step when selecting a floor stripper is ensuring it will not damage your floors. Check the label for directions, and be sure to avoid using a stripper that is not recommended for your surface. The label's directions may also recommend a pretest for colorfastness. Using Hillyard's Assault XL Stripper as an example:
Test on an inconspicuous area using 1:1 dilution. Allow to stand on the floor for 10 minutes. Wipe off with a towel, rinse, and examine the floor for bleeding or softening. Do not continue the use of the product if any bleeding or softening is observed.
Best stripper for high solids floor finish
Arsenal Stripper will remove any water-based polish quickly and easily. It also will remove polish coats that have been repeatedly burnished and hardened with ultra-high-speed floor machines. The superior performance of Stripper will easily cut through multiple layers of any competitive floor polish as well. Not for use on glass, asphalt tile, linoleum, synthetic sports floors, rubber, wood, or painted or varnished surfaces.
Best stripper for low solids floor finish
Devastator is a fast-acting stripper that works quickly to remove the toughest wax and polish build-ups. Removes polish coats that have been repeatedly burnished and hardened with ultra high-speed floor machines. Does the job the first time and reduces labor costs. May be used with a floor machine for extremely heavy polish build-ups. Use on masonry, hard floors and vinyl composition flooring. It should not be used on asphalt tile, linoleum, rubber floors, synthetic sports floors, or any surface that has been painted.
Best low-odor stripper for healthcare and other occupied areas
Assault XL is a premium stripper engineered for efficiency, featuring a low-odor formulation. This fast-acting formulation quickly cuts through built-up floor finish, even if the finish has been hardened by burnishing. The low-odor, non-butyl formulation makes this stripper an exceptional choice for healthcare applications and long-term care facilities where strong odors can impact occupants. Picking up emulsified floor finish is easy and efficient due to the low-foaming nature of this stripper. Additionally, Assault® XL is phosphate-free to lower environmental impact. Recommended for use on tough stripping jobs on quarry tile, paver brick, terrazzo, concrete, and vinyl composition flooring. Do not use Assault® XL on asphalt tile, linoleum, rubber, or painted surfaces.
Best floor stripper for green cleaning
Green Select Stripper is Green Seal certified. Formulated to be, non-toxic, phosphate free, biodegradable, and non-flammable, and it contains no dye or fragrance. Formulated to strip Hillyard One Plus® and EP-22, Hillyard Green Select high solids, zinc-free floor polishes. It can be used to strip a variety of other polishes as well. When used as directed, it is safe to apply to asphalt, vinyl, and vinyl composition flooring. It does an outstanding job of wetting, penetrating, and emulsifying polish.
Best Practice Floor Stripping Procedure
This procedure is available as a video. Click here: How To Strip A Floor
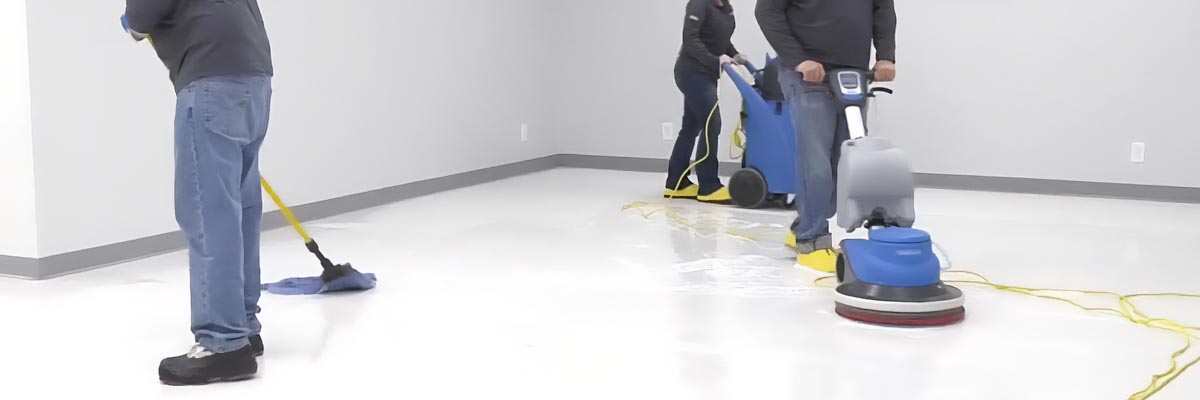
Hillyard's trainers developed the process in this section to guide our customers to strip floors at the lowest total cost. This process requires three or four workers to run efficiently. See below for further explanation. While you could do this procedure with fewer people to optimize your costs, we recommend dedicating the right number of people to the task.
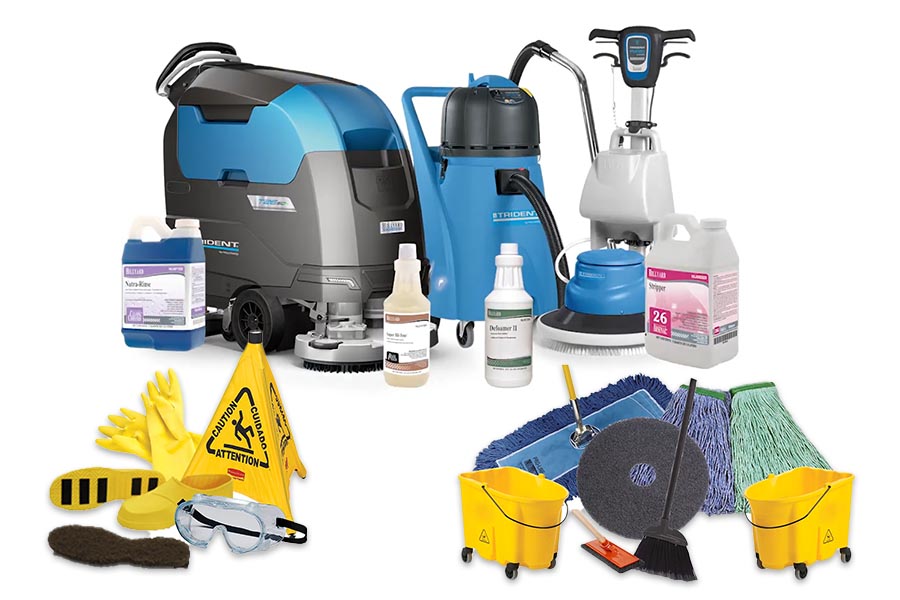
Step 1: Gather Supplies
To follow this procedure, you will need these items:
Step 2: Prepare the Area
- Ensure the area is well-ventilated. Vapors from this process can be harmful. Review the product labels and safety data sheet for details.
- Remove all objects and furniture from the area.
- Sweep the perimeter along the baseboard, moving all dirt and debris away from the wall.
- Dust mop the area.
- Apply a thin coating of Super Hil-Tone to the baseboard using a clean cloth. This will protect the baseboard, making the final clean-up step easier.
Step 3: Strip the Floor
- In a mop bucket, dilute the stripper per the label's instructions. Always follow the mixing instructions and safety precautions on the label.
- Add Defoamer II to the wet/dry vacuum's recovery tank. Defoamer will prevent the foam from interfering with the shutoff float in the wet/dry vacuum, allowing for more solution recovery per tank, improving process efficiency, and protecting the equipment.
- Working in 100- to 300-square-foot sections, apply the stripping solution to the floor at a rate of 250- 300 square feet per diluted gallon.
- Allow the solution to dwell for three to ten minutes. The more layers of floor finish on the floor, the longer the dwell time required. NOTE: Do not allow the stripping solution to dry. If drying starts to happen, apply more stripping solution.
- Using a Trident FMD20 Floor Machine and a black stripping pad, scrub the floor, moving right to left at about two feet per linear second. Start near the floor-to-wall interface and work away from the wall. Allow a 50 percent overlap between each machine pass. NOTE: Do not use an automatic scrubber for this step.
- Use a Doodlebug pad to scrub the area near the floor-to-wall interface that is difficult to reach with a floor machine.
- For heavy buildup, apply more stripper solution and scrub again. Work in a direction perpendicular to the direction during the first pass.
- If the pad becomes clogged with slurry, flip it over or replace it as necessary.
Step 4: Recover the Slurry
- Remove all the slurry from the floor using a wet/dry vacuum. NOTE: Do not use an automatic scrubber for this step.
- If you're working with multiple people, allow some distance between the wet/dry vacuum and the person running the floor machine. If the floor machine is too close to the wet/dry vacuum, it could sling some slurry back onto the clean floor.
- Note that during this step, you might find areas where all of the finish was not removed. If this happens, stop the process and remove the residual floor finish. These areas can be difficult to spot later, so be sure to address them when you see them.
Step 5: Apply Neutralizer and Rinse the Area
- Once the floor is completely stripped, apply Nutra-Rinse, diluted per the label's instructions, to the area. Apply the neutralizer solution at 250 to 300 square feet per gallon.
- Remove the neutralizer solution with a wet/dry vacuum or an automatic scrubber.
- Rinse the floor using an automatic scrubber. Note: If using an automatic scrubber, be sure to rinse or replace the pad after the neutralizer step and before the rinsing step.
Step 6: Cleanup
- After the floor is stripped, wipe down the baseboard to remove any slurry that was splashed up during stripping.
- Each day after use, thoroughly rinse all equipment and allow it to air dry.

Using a Team to Maximize Productivity
By having each team member specialize on a specific task, they can work together to create a continuous process.
- Person #1: Applying floor stripper
- Person #2: Agitating the floor finish with a floor machine
- Person #3: Recovering the slurry
- Person #4: Neutralizing and rinsing the floor
If a fourth person is unavailable, the neutralization and rinsing process can be postponed until the entire area is stripped.
Let Hillyard Help You Strip Floors at the Lowest Total Cost
When it comes to maintaining and enhancing the appearance of your facility's floors, stripping floor finish is essential. However, it can be labor-intensive and time-consuming if not done correctly. This is where Hillyard's representatives come in. Hillyard has a team of experts who specialize in providing best-practice solutions for floor maintenance and helping with training. Use the "I'm Interested" form below, and one of our representatives will contact you to help you develop a floor stripping process that gets the job done at the lowest total cost.